To check for moisture wicking under your home gym flooring, start by inspecting for signs such as warping, discoloration, or any musty odors that could indicate underlying moisture issues. Conduct a thorough visual inspection and consider using a pinless moisture meter to identify hidden problems that could affect your workout environment. For a more comprehensive assessment, place a plastic film on the floor for 24-48 hours to see if moisture accumulates underneath. Regular monitoring is essential to maintain a safe and effective workout space. If you discover moisture concerns, there are effective remediation strategies available to ensure your home gym remains a healthy place for exercising.
Key Takeaways
- Begin by conducting a visual inspection of your home gym flooring for signs of warping, discoloration, or any musty odors that may indicate moisture issues beneath the surface.
- Utilize a pinless moisture meter to quickly assess surface moisture levels, and consider using moisture probes for a more in-depth evaluation when necessary.
- For a straightforward moisture check, tape clear plastic sheeting to the floor for 24 to 48 hours and look for any moisture beads or discoloration that may appear underneath.
- Pay close attention to seams and edges of the flooring for any lifting or curling, and if needed, carefully remove small sections of flooring to inspect for visible moisture damage.
- Regularly monitor moisture levels with moisture meters to uncover hidden moisture pockets, ensuring a safe and healthy environment for your home workouts.
Understanding Moisture Wicking and Its Effects on Flooring
When setting up your home gym, it’s essential to consider the impact of moisture on your flooring and exercise equipment.
Moisture wicking occurs when moisture from the ground or subfloor rises through flooring materials, which can lead to problems like warping, buckling, or even mold growth. This is particularly important to keep in mind if you’re using vinyl flooring in your workout space, as it can be vulnerable without proper moisture barriers.
Signs of moisture include discoloration, swelling, and musty odors, indicating that moisture may be seeping beneath the surface.
To protect your home gym environment, regular moisture testing with appropriate meters is crucial. This proactive approach allows you to detect moisture wicking early and take necessary steps to prevent damage, ensuring that your fitness investment remains safe and conducive for effective workouts.
Signs of Moisture Accumulation Under Flooring
When assessing your home gym flooring for moisture accumulation, be on the lookout for visible signs of damage such as warping or buckling, which can indicate excess moisture.
Additionally, any musty odors may suggest mold or mildew growth beneath the surface, potentially affecting your workout environment.
Addressing these issues promptly is crucial, as it can help maintain a healthy space for your fitness routines and prevent costly repairs down the line.
Stay proactive in ensuring your home gym remains a safe and effective place for your exercise needs.
Visible Floor Damage
Visible floor damage can be a significant distraction in your home gym, potentially affecting your workout experience and safety.
Look for signs of moisture accumulation beneath your flooring, such as warping or buckling in your gym mats or flooring. Discoloration or dark spots near seams can indicate underlying water issues that could compromise your workout area.
In tiled spaces, loose tiles or cracking grout lines may suggest moisture problems that could impact the stability of your equipment. If you notice swelling or buckling in carpeted areas, particularly around workout equipment, it may indicate that moisture has reached the subfloor, posing a risk to your fitness routine.
To ensure a safe and effective workout environment, consider using a flooring moisture meter to check for elevated moisture levels and address any damage promptly. Staying proactive about your home gym’s condition helps protect your investment and supports your health journey.
Musty Odors Present
Musty odors in your home gym can be an alarming sign of moisture buildup beneath your flooring, often unnoticed until it escalates into a more significant issue.
These unpleasant smells typically stem from trapped moisture, which can foster mold growth and may even compromise the structural integrity of your space.
Pay particular attention to areas near seams or edges of the wood flooring, where moisture can seep in and accumulate against the subfloor.
It’s essential to regularly inspect these spots and use moisture meters to detect hidden sources of moisture.
Ignoring musty odors not only affects the air quality in your workout environment but can also lead to warping or buckling of your flooring if moisture problems persist.
Take action promptly to ensure a safe and healthy home gym for your fitness journey.
How to Inspect for Moisture Under Flooring Materials
To effectively inspect for moisture under your home gym flooring materials, start with a thorough visual inspection for signs of damage such as warping or discoloration, which can impact your workout environment.
Next, use a pinless moisture meter to obtain surface readings, helping you compare moisture levels across different areas of your gym space.
For a more in-depth analysis, consider direct testing of the subfloor with moisture probes to identify any underlying issues that could affect the durability of your flooring and your overall health during workouts.
Visual Inspection Techniques
When setting up your home gym, it’s essential to ensure a safe and clean environment. Start by examining your flooring for any signs of moisture, as this can affect the durability of your equipment and your overall workout experience.
Look for discoloration or staining on the surface, as these may indicate moisture wicking from below. Next, check for warping, buckling, or cupping of the flooring material, which can suggest that moisture issues have infiltrated the subfloor, potentially compromising your gym setup.
Inspect the seams and edges for any lifting or curling, as this could indicate moisture accumulation that might lead to safety hazards during your workouts. Additionally, be aware of any musty odors, as they may signal mold or mildew growth from trapped moisture, which can be detrimental to your health while exercising.
If necessary, consider removing a small section of flooring to assess the subfloor for visible signs of moisture damage or deterioration, ensuring your home gym remains a safe and effective space for your fitness journey.
Moisture Meter Usage
While visual inspections can provide some insight into your home gym setup, to ensure that your flooring can handle the demands of your workout routine, using a moisture meter is essential. For effective moisture meter usage in your home gym, consider the following:
| Moisture Meter Type | Application |
|---|---|
| Pinless | Non-destructive testing for various flooring materials |
| Insulated Pin | Precise readings for wood subfloors, ensuring stability for heavy equipment |
| In-situ Probes | Concrete moisture test to prevent potential damage to gym flooring |
| Relative Humidity | Measures humidity levels in concrete slabs, crucial for maintaining a healthy environment |
| Regular Monitoring | Helps prevent long-term damage from excessive moisture and keeps your gym safe |
Conduct tests before, during, and after setting up your home gym to ensure acceptable moisture content, ultimately protecting your investment and enhancing your workout experience.
Signs of Damage
Moisture under flooring materials can lead to significant damage, so it’s crucial to stay vigilant for signs that indicate problems beneath the surface, especially in your home gym.
Inspect wood flooring for warping, buckling, or crowning, as these may signal moisture wicking that could affect your workout space. Look for discoloration or dark spots that suggest trapped moisture, and check tile for loose pieces or cracked grout, which can indicate adhesive failure due to excess moisture.
Conduct moisture readings using a meter for quantitative data to ensure your gym environment remains safe and healthy.
Additionally, don’t overlook musty odors or mold growth in corners, as these are clear signs of moisture issues within your concrete subfloor that could impact your fitness routine.
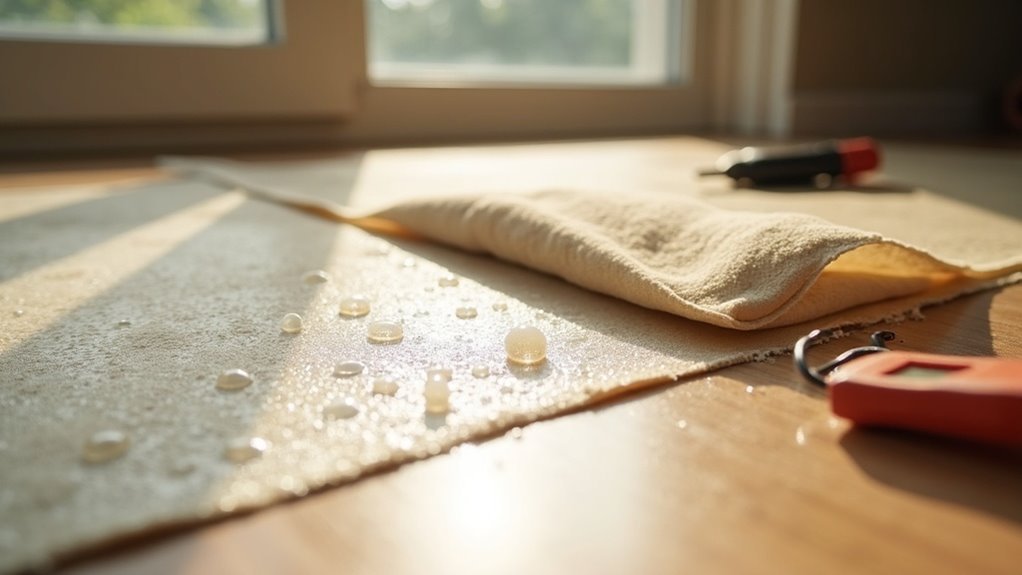
Performing a Moisture Test Using Plastic Film
How can you effectively determine if moisture is affecting the flooring in your home gym? A moisture test using plastic film is a simple and effective method. Here’s how to do it:
- Cut a piece of clear plastic sheeting (about 18 inches square).
- Tape it securely to the concrete floor of your gym space, sealing all edges to block air.
- Leave it in place for 24 to 48 hours to allow moisture issues to become evident.
- After the time has passed, check for moisture beads or discoloration on the underside of the plastic.
If you detect moisture, consider using a moisture meter for precise assessments of the subfloor and the flooring.
This will help ensure your home gym remains a healthy environment for exercising.
Utilizing Moisture Meters for Accurate Readings
After conducting a moisture test in your home gym with plastic film, if you notice signs of moisture, using a moisture meter can provide more accurate insights into the situation.
Moisture meters, like the Tramex ME5 and MEX5, deliver precise readings for various flooring types commonly found in home gyms. Ensure you select the appropriate settings based on material density for reliable measurements.
Regular use of a moisture meter helps identify hidden moisture pockets, which can lead to issues like mold growth or flooring deterioration, ultimately affecting your workout environment.
For effective moisture mapping in larger gym areas, choose models that visualize moisture distribution effectively.
Remediation Strategies for Moisture Issues in Flooring
Identifying and addressing moisture issues in flooring is crucial for maintaining a safe and functional home gym environment. This is especially important for both men and women who prioritize their health and fitness.
Start by pinpointing the source of moisture problems, then implement the following remediation strategies:
- Utilize dehumidifiers and fans to reduce humidity levels, creating a more comfortable workout space.
- Regularly measure the moisture levels in affected areas to stay ahead of potential issues.
- Install a moisture barrier, such as polyethylene sheeting, to prevent moisture from wicking up through the flooring.
- If necessary, remove damaged flooring to assess and properly dry the subfloor underneath.
By taking these steps, you ensure effective management of moisture issues while preventing future complications that could disrupt your fitness routine.
Prioritizing a vapor barrier installation will provide long-term protection against moisture-related damage, allowing you to focus on your home workouts with peace of mind.